Thursday, December 19, 2013

Nature Crowns

With today's post, my hope is to illustrate just how simple learning from home can be. It doesn't take much preparation or planning in the early years to create meaningful learning opportunities. Not only that, but when a parent follows the child's cues and capitalizes on their interests, the learning becomes that much richer.

Today we made nature crowns. 


Early this morning, my daughter said she wanted to make some nature jewelry. After cleaning her room (a task that needlessly took ALL morning, but perhaps that's a post for another day), we went outside. With us, I brought a sheet to sit on, a single hole punch, a pair of safety scissors, a roll of masking tape, and some yarn. And my coffee, since I drink that stuff all day long.

Since my son was with us and I wanted to get him interested in this game, I suggested making crowns and they were both all for it. 

Task one: collect some leaves. Daniel ended up collecting all the brown ones that had already fallen. At first I discouraged this because I wasn't sure if they would hold up to a hole punch. But we discovered that they worked well and he went for it. Natalie stuck with mostly live, green leaves. 

Task two: punch some holes in those leaves. 


After I took this picture, I suggested punching two holes in each leaf so that they would lay flat on the crown.

They were both able to punch their own holes, which is excellent for developing fine motor skills.

This part also took some time to complete, requiring persistence and patience (several of the leaves tore during the punching process). 


Task three: string the leaves in the same way that you'd string beads. I wrapped one end of the yarn with a short piece of masking tape to prevent it from fraying. Then I tied one leaf onto the other end and gave each child their string.


Along with leaves, they each dug up one of our pesky ferns (those things are crazy hard to get rid of) in order to find the seed and I helped them tie the seed onto their crowns. 

Natalie also collected several small flowers to poke into the punched holes in her leaves. Daniel chose to poke in a little fern. I love how they were presented with the same project and came up with very different results. 

Daniel's kind of reminds me of Lord of the Flies. The fact that he took off his shirt really only adds to the whole image in me head. (On a side note, I cannot believe how warm it's been here lately. Yes, these pictures were actually taken today, December 19.)


Such a cutie!


And Natalie's was just so sweet with her greenery and yellow flowers.


Very fitting for a sweet girl.


After they finished with their crowns, they went off to play "king" and "queen" for a little while. It fills me with happiness to watch this kind of play go down...creating something and then using that creation in their pretend world. So, so good. 


How does this fit with a Charlotte Mason education? Not only was this activity a complete game for my youngsters, but while playing, they were observing and identifying nature. We found several different types of plants and named them, and we discovered which plants were hardier and which were more fragile. 

Not only that, but the kids were working on simple skills (hole punching and stringing leaves) which will lead to the development of more complex skills (and more involved handicrafts) as they grow.  

And they loved it. They had a lot of fun. That's not specifically Charlotte Mason, but I think we can all agree that when kids are having fun learning it's nothing but a good thing. 

*          *          *

If you enjoyed this post, please consider subscribing by email to receive updates on new posts!

You can also follow my blog through Instagram, Pinterest, Facebook, Bloglovin, or Google+.

For a list of all the parties that I link up with each week, please visit my Linking Up page!

Tuesday, December 3, 2013

The Jesse Tree: Noah's Rainbow and God's Promise

This is the third year that we've done a Jesse Tree, and I don't see an end to it any time soon. I simply love this tradition - what an awesome way to lead little ones through the Bible to the story of Jesus's birth. If you're not familiar with a Jesse Tree (I wasn't until the year that we started the tradition), the general idea is this: each day during advent your family will read a new Bible story, starting with creation, moving through the old and new testaments, and finally spending the last few days on the Christmas story. After reading the story and finishing whatever devotion or activity you choose to go along with it, you'll place a symbolic ornament on your Jesse Tree. That's it. Super easy. 

The neat thing about a Jesse Tree is that there's enough structure to carry you through a meaningful advent, but enough freedom to be all kinds of creative. A Jesse Tree might look very different from one house to the next, and there's really no wrong way to do it. If you'd like to start this tradition (and you can totally start today even though we're already a few days into advent), there are plenty of websites online to give you some ideas. Type in "Jesse Tree" into Pinterest and you'll be overwhelmed with all that's available. 

In our house, I like to have a project to go along with the different Bible stories...not all of them, because that's completely overwhelming, but I try to get in maybe three a week. Today I wanted to share with you the project we did to go along with the story of Noah, the ark, and the rainbow symbolizing God's promise to His people. 

So. Have you seen those awesome melt-the-crayon projects floating all over the blogosphere? I've had several of those pinned for ages. They've been on my mental to-do list since I opened a Pinterest account. Rainbows...crayons...beautiful, color-saturated wax rolling down the paper in neat little lines? Yes, please.

Apparently, those projects are a lot harder than they look. 

Ours didn't quite turn out how I envisioned it, but I like it anyway - totally hang it up and admire it worthy. 

Noah's Rainbow and God's Promise


Materials:

canvas or construction paper/cardstock, cardboard, mod podge
crayons in your color choices
craft glue
hair dryer
watercolors
paint brush

Process:

First, let me just say that since I planned this project for a three year old, it was definitely collaborative. I would not advise letting young children melt the wax since it gets pretty hot. I helped Daniel glue on his crayons and melt the wax....he did the rest himself. 

If you happen to have a canvas lying around, great. Use that. If, like me, this project is happening sort of on a whim, then here's a quick trick:

Find some cardboard:


And some black and white paper. I used construction paper.


Use Mod Podge to adhere your paper to the cardboard. I cut about an inch off all sides of the white paper to create a sort of black mat (totally optional). 

You might find that the cardboard starts to bend as the glue dries. To straighten it back out again, I put the whole thing under several books for a little while.

(Hi Silas!)


While Daniel's canvas was drying, we talked about Noah and the flood. This is a story he's heard a million times before, so it was really just a review. I did, however, emphasize the rainbow part of the story, a symbol of God's promise to never again flood the earth. We talked about what God did instead to take care of the sin in the world (He sent Jesus). One of the things I love about the Jesse Tree tradition so much is that, with each story, you can point your children toward Jesus and God's great plan to take care of his people. 

After our discussion, I set Daniel in front of the crayon box and instructed him to find these colors: red, orange, yellow, green, blue, purple (we also added in indigo). 

At the last minute, I decided we should take the paper off.


This might have been our downfall. In all the projects I've seen, the crayons still have their paper. Maybe that helps to keep the colors separate as they melt? I'm not sure, but for better or for worse, our paper came off. 

Then I used craft glue to glue the crayons to our canvas.


In my head, as the crayons melted, long ribbons of color would begin to gracefully ark upwards...like a rainbow. 

Yeah.

This is what happened.


Agh! It looks like an octopus! Ah well. We will continue on. 

After you've melted those crayons, let them dry. It takes almost no time at all, but it's an important step (obviously).

(Note that the picture is being held down by books again...this is because it began to curl during the melting process. After a few minutes under some books, though, it flattened back out.) 

I had intended for Daniel to paint the rest of the picture after we melted the crayons. I was going to leave what he painted up to him. I thought maybe the flood waters would be nice, or the sun, perhaps. So I set him down at the table with his dry crayon art, the watercolors, and a paint brush, and let him go to town.

And he did. 


He ended up adding color...a lot of it. And I ended up absolutely loving the result. So maybe our melted crayon rainbow didn't work out exactly as I had hoped. Daniel saved the day by making  his own rainbow.

Noah's Rainbow and God's Promise
Daniel, age 3
...and mom

*          *          *

If you enjoyed this post, please consider subscribing by email to receive updates on new posts!

You can also follow my blog through Instagram, Pinterest, Facebook, Bloglovin, or Google+.

For a list of all the parties that I link up with each week, please visit my Linking Up page!


Sunday, December 1, 2013

Paper Stars Tutorial

When I was in first grade, I got in trouble with the law. And by the law I mean my teacher, and by trouble I mean a note was sent home. This was a big deal to me. Not only did I consider my relationship with my teacher to be pretty darn special since we shared the same birthday and everything, but I never got in trouble. And I do mean never. 

This particular trouble was over one of those paper fortune tellers. You might remember these things from your own grade-school days. The basic idea is that you fold your square sheet of paper into quarters, fold in the corners, flip it over, fold in the corners again, and - suddenly - you've got yourself a cool little game. Until you start adding in some elementary insults, such as "You have a bird brain." Then there's trouble.

All that to say this: if you've ever folded one of those fortune tellers (whether or not yours contained the sort of insults that mine did), then you're well on your way to understanding how to make one of these beautiful little paper stars (I first saw these stars over here). Seriously, guys, they're so easy. 


Time consuming, yes. But definitely easy.

Materials:
14 square sheets of paper, all the same size (mine were 4" x 4")
glue (I used Elmer's, but any kind of paper glue would work)
paper towel

Process:

Pull out one sheet of paper:


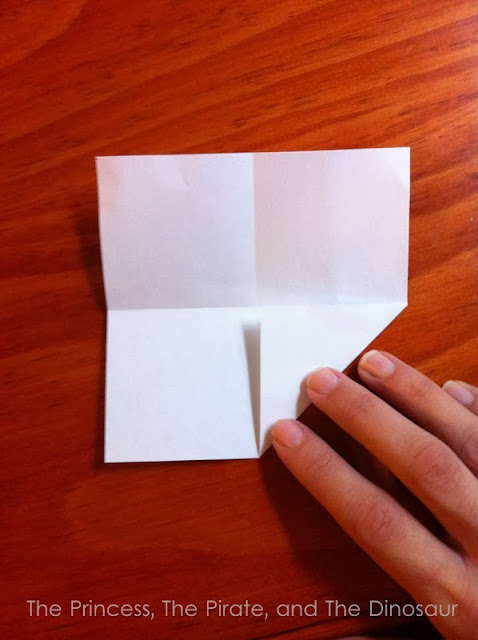
Fold it in half vertically, open it, fold it horizontally, and then open it again.


Fold in each corner.


Then fold two opposite corners in a second time. Your paper will end up looking like a kite.


Flip the "kite" over.


Fold down the top part of the "kite".


Finally, fold the paper in half, making sure that the smaller triangle is on the outside:


There! If you've made it this far, you're well on your way. This is one of the beams of the star. Fold the rest of your papers the same way until you end up with 14 altogether (like I said, time consuming).


Now it's time to start piecing the beams together. Notice that each beam has two flaps. You're going to insert those flaps into two holes in the back of another beam.


Here's the same process from another angle:


Keep joining the beams together this way,


Until you get the full circle:


Do not add glue during this time. You're going to need to do some adjusting as you go, and if you start gluing right away, you won't be able to make those adjustments. 

After your star looks more or less the way that you like it, gently pull out one of the beams and add a spot of glue on the front and back of each flap.


Then fit it back into place. With a finger, wipe up any glue that oozes out of the side and dry on your paper towel. Continue in this way until the entire star is glued up, making adjustments as necessary. Let dry.

That's it! Now, go make several of them. It gets kind of addicting. 

I made one as a Christmas ornament:


And a few to keep up all year, just cause they're awesome.


Have fun!

*          *          *

If you enjoyed this post, please consider subscribing by email to receive updates on new posts!

You can also follow my blog through Instagram, Pinterest, Facebook, Bloglovin, or Google+.

For a list of all the parties that I link up with each week, please visit my Linking Up page!


Thursday, November 21, 2013

I'm Tired.


I'm tired. I am tired of my uncooperative back. I'm tired of not being able to walk normally or stand up without wincing. I am tired of tantrums and complaints. I am tired of little boys peeing on the couch. I'm tired of looking at our gross, dirty green carpet. I'm tired of not being able to vacuum it.

I'm tired of our two-day rotation of oatmeal and cereal, or our three-day rotation of ham and swiss, grilled cheese, and peanut butter and jelly. I'm tired of looking in the pantry, desperate for some new dinner ideas, and not coming up with much. I'm tired of eating chicken.

I'm tired of constantly feeling behind with the organic and whole foods trend. It seems like I can never measure up in this strange new world of juicing and carrot and spinach shakes. I mean, who wants to drink a spinach shake? I prefer chocolate. I'm tired of feeling like I'm not giving my kids the very best because I still give them goldfish crackers for a snack. I'm tired of comparing myself with others. 

But most of all, I'm tired of being tired.

I wish that I had boundless energy, this crazy excitement about mom-life that just comes gushing out of me every which way. I wish that I had never-ending patience and a constant smile and all the answers to domestic bliss.

I don't have those things.

But I do have a four year old little girl who stood next to me at the sliding glass door today.

“You're sad, mom.”

“Yeah, I'm a little sad.”

“Why are you sad?”

It kind of jolted me, her question. It made me realize that it's not just about me. When I'm upset, they see it. They understand. They're old enough to start connecting some dots.

And I don't want them to grow up thinking that I'm tired of them.

Because, the truth is, all the stuff that comes with being a mom (or dad) is hard. It's a lot of work. There are easy days and not-so-easy days. There are fun times and not-so-fun times. But the truth is, I really like my life.

And I'm tired, but I'm not tired of them.

*          *          *

If you enjoyed this post, please consider subscribing by email to receive updates on new posts!

You can also follow my blog through Instagram, Pinterest, Facebook, Bloglovin, or Google+.

For a list of all the parties that I link up with each week, please visit my Linking Up page!


Wednesday, October 23, 2013

Creating a Model and Reenacting the story of "The Three Billy Goats Gruff"

Preschoolers love role play. And I do mean love. 

Give them a costume, give them a puppet, get involved in a story with them, and they're off and running. They cannot get enough of pretend play. Which is why reenacting a story is such a natural way to draw preschoolers into narration.

The catch here is the getting-involved-in-the-story-yourself part. I have found that it doesn't take much to get my kids into reenactment, but it does take something. They need an example to follow. But once you give them that example, then they've got it - and it's so much fun!

This week, we're reading "The Three Billy Goats Gruff," loosely connecting it to letter B week. We've read this story so many times (and it's only Wednesday), and it's such a simple story, that it makes for a pretty great start to this kind of narration. 

I decided to start small, letting the kids reenact the story with character cards. Any kind of puppet would do. I found this awesome idea to recreate the setting of "The Three Billy Goats Gruff" over at this website. But instead of cutting the pieces out of colored card stock, I wanted Daniel to actually paint the pieces of his model. 

Creating a Model and Reenacting the story of "The Three Billy Goats Gruff"

Materials:

2 pieces of white card stock
scissors
paint brush
tempera paints (we used blues, greens, yellows, oranges, and black)
black marker
glue
character cards (I printed ours out from this website)

Process:

Before the project, cut out two wide strips from one of the pieces of card stock. One strip should be slightly wavy (this is the stream under the bridge). The other strip will end of being the wooden bridge. Look below for pictures to help explain.

Daniel started by painting the grass for the pastures. We didn't do this (hind sight is 20/20!), but afterwards I thought that a great extension for this project would be to go outside to do the painting. How fun would it be to go out and observe the colors of grass, water, and actual wooden bridges?

We just talked about those colors. Ah well. 

Here's Daniel working on the grass. Since this is a bird's eye view model, Daniel painted the entire page green.


After the grass, Daniel wanted to paint his bridge piece. We discussed the fact that it was probably a wooden bridge. I asked Daniel what color he thought it should be, and when he replied that it should be brown, we discovered that we had no brown paint in our stash! 

Time to mix some up. We tried yellow and orange first, but it was too light. Then I squirted in a little black, and that seemed to do the trick. Daniel had a lot of fun stirring it up! And painting, of course. 


Once painted, we set it aside and Daniel painted the stream. As before, we talked about the colors of water. 


We tried to come up with some things that you might find in the water that aren't blue, things like river grass and mud. We talked about what those colors might be.


Then it was time to let all the pieces dry.

Patience. We picked Natalie up from school. We ate lunch. They took a nap. Well, they had quiet time anyway. There was hardly any sleeping going on back there. 

After nap, it was time. 

Daniel glued the stream down first:


Then the bridge. Before we glued it down, I let Daniel use a Sharpie to mark off the wooden planks:


Gluing it down was tricky, and required some help from me. I folded each end under about half an inch, squirted some glue on the folded pieces and Daniel put them down.


Then it was time to play! By this time, Natalie was a full participant (so much so that after this, she wanted to make her own model, which she promptly did), and had also heard the story many times this week, so she was able to reenact with Daniel.

Here's a little Instagram action:


Before reenacting, I read the story to them. Then I closed the book and put it aside. I will say that they both looked at me, a little unsure of what to do first. So I played the part of Little Billy Goat Gruff. I acted out the part, saying things like,

"Oh, I would really like to cross that bridge and eat some juicy green grass! I wonder if that fearful troll is at home. Oh well, guess I'll just cross the bridge and see...trip trap, trip trap."

It didn't take long for the kids to get as into it as I was. Using all the different voices, they retold the story, in their own words, without the aid of the pictures in the book. Being such a simple story really helped. If you try this with your kiddos, I would encourage you to choose a very simple classic with a lot of repetition (Little Red Riding Hood, Goldilocks and the Three Bears, The Three Little Pigs, etc.). 

And have fun with it! Learning at this age should be mostly fun. If you have fun with all the different voices, your kids are likely to get into it, too ;)

*          *          *

If you enjoyed this post, please consider subscribing by email to receive updates on new posts!

You can also follow my blog through Instagram, Pinterest, Facebook, Bloglovin, or Google+.

For a list of all the parties that I link up with each week, please visit my Linking Up page!


Friday, October 18, 2013

Friday's Art Smarts: Collage in the Style of Eric Carle

Last week, as a part of Daniel's school, we read "The Very Busy Spider". On Monday I showed you the puppets I made to help Daniel narrate, or retell, the story in his own words. Since I introduced those puppets, he's pulled them off the shelf several times in order to tell me the story again. Yay! I love it when things are a hit. Much better than when things are a flop. You know what I'm talking about, right? The activities where you're kids just look at you like you're crazy. Or, even worse, when there's a whole lot of awkward silence while you try to figure out what to do next because you didn't really plan the activity that well to begin with. It's painful. But (yay!) the successes totally make up for the fails. 

We also began a multi-stage collage project last week and finished it up today. What Eric Carle unit is complete without a little Eric Carle style art?

Materials:

card stock (we used white, but the color is up to you)
crayons
tempera paint
paint brushes
paint trays
play dough tools (or other small tools to make scratches into wet paint)
pencil
scissors
glue

Process:

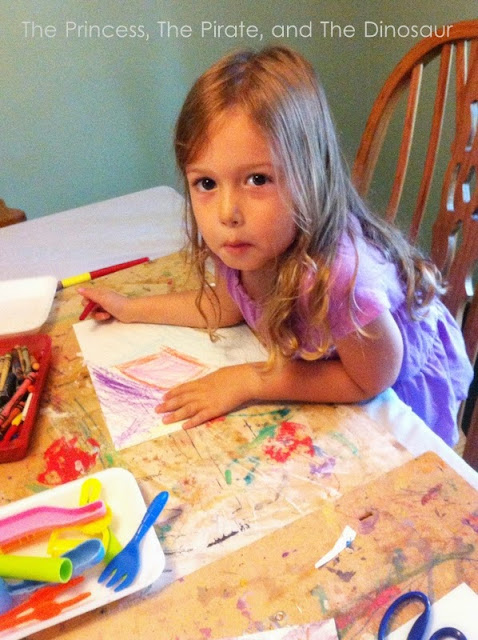
The project begins in the same way as the Sgraffito project we did last summer. The very first step is to let the kids color one piece of card stock. The darker the colors, the better. Also be sure to instruct them to color every last inch of the paper. This is the first step in several; the idea here is to color the paper, not to make a representational drawing. 


The next step is to paint over the crayon color. I squirted a little paint into a tray, gave each kid a brush, and told them to paint the entire paper. They were allowed to use whichever colors they wanted. Again, this is the next step in a multi-stage project; this is not the final piece. The purpose here, like before, is simply to add color. 

Even Silas got in on the act with this project! Although, he just painted...pretty much all his little toddler hands can handle. 


After painting, give your kiddos access to the play dough tools and let them make all kinds of different scratches in their wet paint. We used rollers, rolling pins, plastic knives and forks, and the ends of the paint brush. I didn't give the kids any instruction at this point. Just presented them with the tools and told them the basic idea. They loved it!

Here is Natalie's completed painted piece:


Let the pieces dry. Depending on how much paint your child uses, this could take 30 minutes or all morning. Be patient. You'll need a completely dry piece before moving on to the last step. 

Before starting the next step, we took a look at our story, "The Very Busy Spider". I pointed out a few illustrations, such as the fence posts,


and the rooster.


We talked about how each illustration was made by piecing together basic shapes. We noted that the fence was made out of long, thin rectangles and the rooster was made with a few different shapes, including circles and triangles. 

I then gave scrap paper to the kids and we drew an ice cream cone, a flower, a house, a person, and a tree using only basic shapes. Oh, and a fairy. Of course. 

I also told the kiddos to think about what they wanted their final picture to be. Did they want to make a flower? A tree? A person? We talked about how, sometimes, it's important to plan out and think about what you're going to do before you dive in and do it. 

Daniel decided he wanted to make a spider, inspired, I suppose, by the story. We talked about what kind of shapes he'd need to make a spider and (trust me, I had to really guide him here) came up with a circle for the spider's body and long thin pieces for the legs. 

With Daniel, I really had to help him out. I drew a circle and some lines on the back of his art and gave him a pair of safety scissors. While he cut, I helped him turn his paper so that he could cut out the general shape. 

He also did some cutting on his own ;)


Natalie decided that she would rather piece together a series of shapes to make an abstract collage. Not quite what I had intended for this project, but I decided to step aside and let her do her thing. I really didn't have to help her at all. She first drew some shapes on the back of her painted paper, and then got busy cutting.


They both turned out quite well! I was really proud of Natalie's fine motor skills in action. They've come a long way even since last spring.

Natalie, age 4

And I really loved Daniel's composition. What a great spider!

Daniel, age 3

And Silas, of course, finished his art. Kind of cool that I have three pieces to share with you today!

Silas, age 1

Thanks for reading! Hope you're feeling inspired to go create some beautiful Eric Carle style collage! Let me know if you blog about it - I'd love to see some finished pieces!


*          *          *

If you enjoyed this post, please consider subscribing by email to receive updates on new posts!

You can also follow my blog through Instagram, Pinterest, Facebook, Bloglovin, or Google+.

For a list of all the parties that I link up with each week, please visit my Linking Up page!