Showing posts with label craft. Show all posts

Thursday, December 19, 2013

Nature Crowns

With today's post, my hope is to illustrate just how simple learning from home can be. It doesn't take much preparation or planning in the early years to create meaningful learning opportunities. Not only that, but when a parent follows the child's cues and capitalizes on their interests, the learning becomes that much richer.

Today we made nature crowns. 


Early this morning, my daughter said she wanted to make some nature jewelry. After cleaning her room (a task that needlessly took ALL morning, but perhaps that's a post for another day), we went outside. With us, I brought a sheet to sit on, a single hole punch, a pair of safety scissors, a roll of masking tape, and some yarn. And my coffee, since I drink that stuff all day long.

Since my son was with us and I wanted to get him interested in this game, I suggested making crowns and they were both all for it. 

Task one: collect some leaves. Daniel ended up collecting all the brown ones that had already fallen. At first I discouraged this because I wasn't sure if they would hold up to a hole punch. But we discovered that they worked well and he went for it. Natalie stuck with mostly live, green leaves. 

Task two: punch some holes in those leaves. 


After I took this picture, I suggested punching two holes in each leaf so that they would lay flat on the crown.

They were both able to punch their own holes, which is excellent for developing fine motor skills.

This part also took some time to complete, requiring persistence and patience (several of the leaves tore during the punching process). 


Task three: string the leaves in the same way that you'd string beads. I wrapped one end of the yarn with a short piece of masking tape to prevent it from fraying. Then I tied one leaf onto the other end and gave each child their string.


Along with leaves, they each dug up one of our pesky ferns (those things are crazy hard to get rid of) in order to find the seed and I helped them tie the seed onto their crowns. 

Natalie also collected several small flowers to poke into the punched holes in her leaves. Daniel chose to poke in a little fern. I love how they were presented with the same project and came up with very different results. 

Daniel's kind of reminds me of Lord of the Flies. The fact that he took off his shirt really only adds to the whole image in me head. (On a side note, I cannot believe how warm it's been here lately. Yes, these pictures were actually taken today, December 19.)


Such a cutie!


And Natalie's was just so sweet with her greenery and yellow flowers.


Very fitting for a sweet girl.


After they finished with their crowns, they went off to play "king" and "queen" for a little while. It fills me with happiness to watch this kind of play go down...creating something and then using that creation in their pretend world. So, so good. 


How does this fit with a Charlotte Mason education? Not only was this activity a complete game for my youngsters, but while playing, they were observing and identifying nature. We found several different types of plants and named them, and we discovered which plants were hardier and which were more fragile. 

Not only that, but the kids were working on simple skills (hole punching and stringing leaves) which will lead to the development of more complex skills (and more involved handicrafts) as they grow.  

And they loved it. They had a lot of fun. That's not specifically Charlotte Mason, but I think we can all agree that when kids are having fun learning it's nothing but a good thing. 

*          *          *

If you enjoyed this post, please consider subscribing by email to receive updates on new posts!

You can also follow my blog through Instagram, Pinterest, Facebook, Bloglovin, or Google+.

For a list of all the parties that I link up with each week, please visit my Linking Up page!

Thursday, July 4, 2013

Decoupaging Boxes

Decoupage is the art of adhering pieces of paper to another object with a decoupage medium, like Mod Podge. It is, in my opinion, one of the simplest ways to transform an ordinary object into something truly unique - and it is so simple. A 3 year old could do it.

In fact, a a 3 year old has done it.

I've been letting my kids explore this technique lately (you can read about our first project using Mod Podge here) because it is simple and also because they love it. Nothing like a win-win! (grins)

On Monday I announced that we were taking a trip to Hobby Lobby. My original plan was to get some sort of sewing kit that would introduce very young children to sewing, but while I was looking at the options, I decided that it would be a mistake. Natalie is just too young still for that kind of project. We have lacing cards at the house...I decided that the best thing for her right now, as far as sewing, would be to practice with those cards.

But we were already in the store, and the kids were pumped. I mean, they were shouting and exclaiming and waving their arms wildly about. It really made me want to bring them to Hobby Lobby more often. I ended up walking out of the store $5 poorer, but with two very excited little kiddos. It really doesn't take much to make them happy.

The thing they were so excited about were these cardboard boxes. They both reeeaaally wanted to get a box. So that's what we ended up taking home with us. I also walked us over to the paper aisle and let them each choose a piece of decorative paper. Daniel had his in five seconds or less, but Natalie spent a good 5-10 minutes deliberating. Big decision.

Okay, okay. Here's what we did with those boxes.

Materials:


 1. plain box
2. tempera paint
3. paint brushes
4. decorative paper
5. Mod Podge (or other decoupage medium)
6. brush for painting on the Mod Podge
7. scissors (optional)

Process:

I began by letting my kiddos paint their boxes. I knew they probably wouldn't cover the entire box with paper, so I wanted whatever didn't get covered to still have some color.


This was the messiest part of the whole project (and it wasn't so bad).


Let the paint dry. We let ours dry overnight and finished the boxes the next day.

When we sat down again, I brought out the paper and scissors and told the kids to cut shapes out of their paper.

My first idea was to cut the paper to size and fill the whole box with it, but I realized even before we began that that would be too hard and I'd end up doing more of the project than I was comfortable with. So instead, I gave them permission to just kind of go crazy with the scissors.

Natalie happily obliged and Daniel tried. But he's still getting the hang of cutting and it's difficult for him. So after a few minutes, he put the scissors down and started tearing the paper into small pieces.

The boy's like Linus with his Blankie. He actually wears it tied around his shoulders like a cape. Turns out that stereotypes are stereotypes for a reason.

And you know what? I really liked that effect! So I encouraged him to keep going.

Next, brush on the Mod Podge. You need a good, healthy first layer.


After the first layer, add some paper. The main thing to remember here is that you really need to press the paper down hard to get all the air pockets out. If you neglect this step, you might end up with bubbles in the end. Not terribly nice.

If you want to add layers and layers of paper (as Natalie did, above), make sure you put a layer of Mod Podge between each piece.

After the paper, add a final top coat of Mod Podge, and... that's it! It dries to the touch pretty quickly, but I made my kids wait another night before they could play with their boxes.

So super simple, even a 3 year could do it ;)


Treasure Box with Web
Daniel, age 3


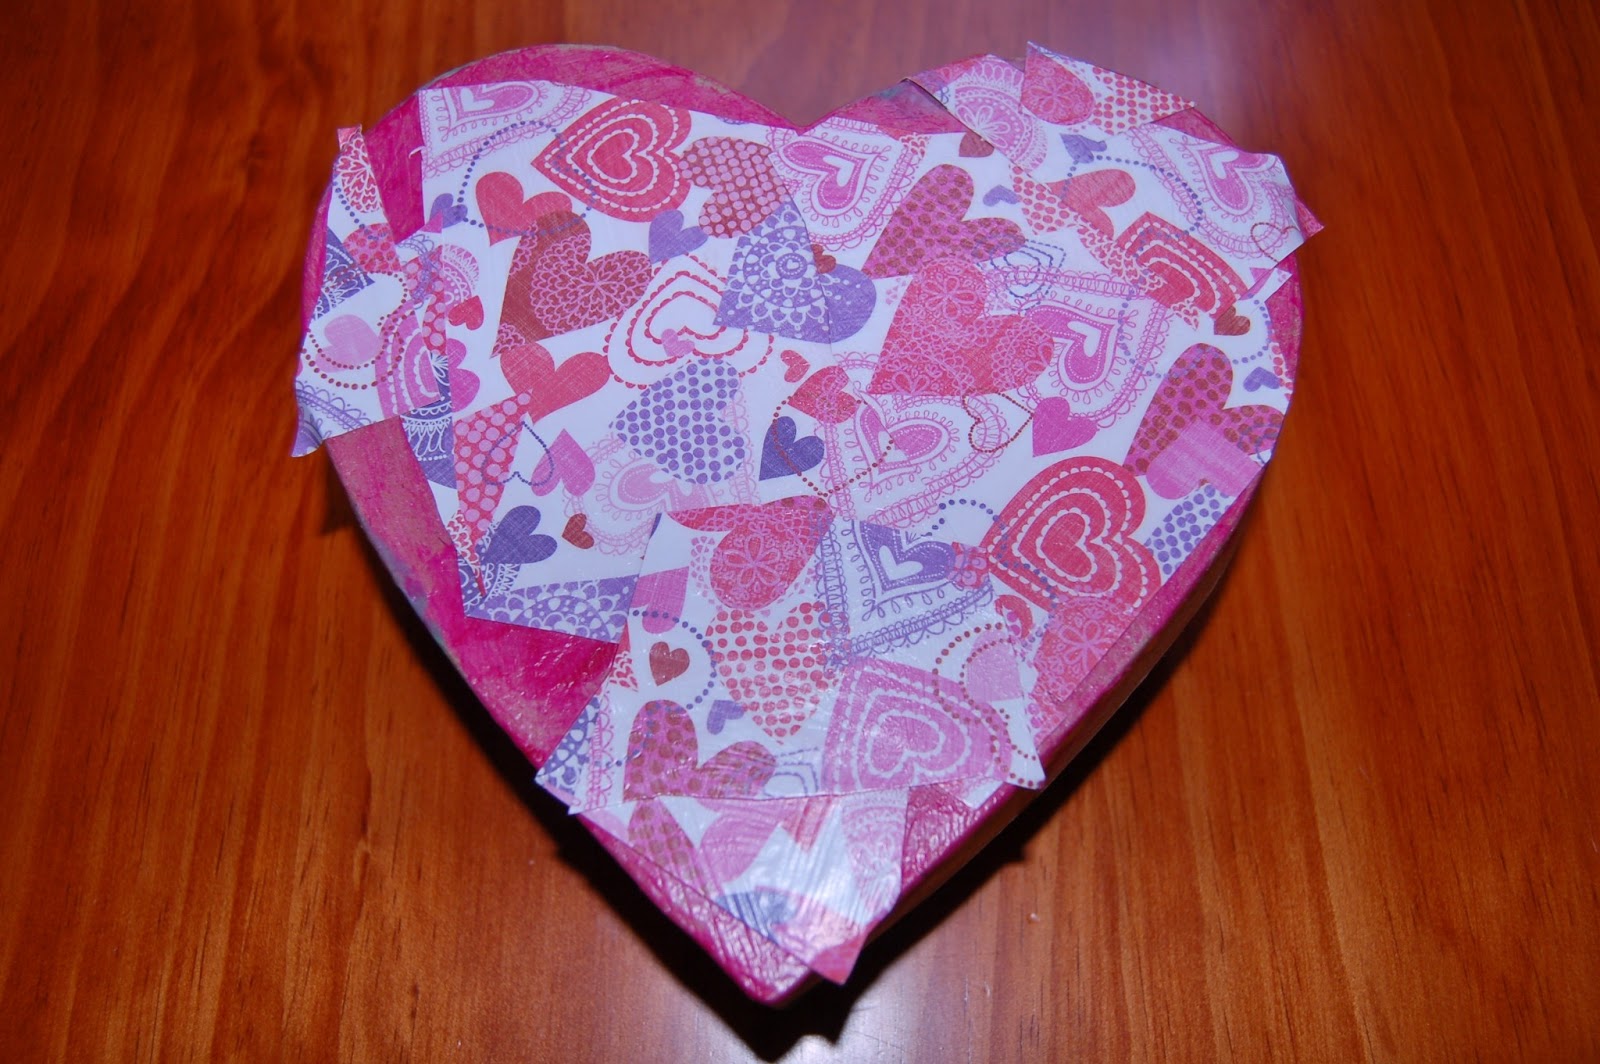
Heart-Shaped Box
Natalie, age 4

Lots of fun and not a lot of money or preparation! And so many possibilities. If you're not careful, you're going to begin looking around your house with crazy eyes, wondering what you can decoupage next. Trust me, I've been there ;)

*          *          *

If you enjoyed this post, please consider subscribing by email or liking my page on Facebook to receive updates on new posts!


For a list of all the parties that I link up to each week, please visit my Linking Up page!


Wednesday, June 26, 2013

Summer Wind Catcher

a.k.a., not-a-fourth-of-July summer craft.

I said to myself this week, "Self, get on Pinterest or put on your thinking cap or recall some childhood project and come up with a fourth of July craft. And do it quick, because you can't post a time-sensitive craft like that the day before the holiday. You've gotta give people time."

So I did. I looked through Pinterest. I put on my thinking cap and I tried to recall some good old American crafts. But I either came up blank or, honestly, just didn't like anything I found. I rediscovered through this whole process (because I already knew this about myself) that I actually don't really like cutesy crafts. At all.

Is that awful?

Well, it is what it is. So I scrapped the fourth of July craft idea and decided to just celebrate summer instead.  Here's what I came up with:

Summer Wind Catcher

First of all, this is an inspired project. I found the original idea at The Craft Train, and I loved it because the idea was so basic that the artist could take it in all kinds of different directions. Here's what we did.

Materials (what you see here are the materials needed to actually assemble your wind catcher):


1. One gallon milk or water jug (not pictured)
2. fabric
3. sea shells
4. wooden beads
5. jingle bells
6. paint markers (not pictured)
7. fabric stiffener (not pictured)
8. hemp or jute rope
9. fishing line
10. stick (not pictured)
11. scissors
12. hole punch (not pictured)
13. paint brush (not pictured. Make sure it's a messy brush; it's for the fabric stiffener.)

Process:

I'm not gonna lie. This project was a bit more involved than I anticipated. Once all the prep was done, then it was super quick and easy. But there was some prep work involved. Your kids, depending on their age, can help with some of it. You'll have to do the rest. All right. Here we go.

First, cut your gallon jug into little pieces. Then hole punch each piece two times. Here, I've only hole punched them once, but I quickly discovered that they needed two holes. Trust me.


Set them aside. Then cut your fabric into pieces that are similar in size and shape to the ones above. After you've got them all cut, brush a layer of fabric stiffener over each piece and let dry. This was actually a pretty quick step and it's important! After they're dry, go ahead and hole punch them twice as well and set them aside.


While you're fabric is drying, take your gallon jug pieces and your paint markers outside. I showed my kids how to use the markers to paint each piece. 


Daniel painted two pieces and Natalie painted several pieces. Then this happened:


Why, yes. We were all outside in our jammies. That's how we roll around here.

After you've finished painting the rest of the pieces because your kids lost interest, go inside for awhile. Let them dry. Have breakfast and put the baby down. Then you can finish your wind catcher.

The first thing you need in order to assemble these little guys is a hanging stick. I brought my kiddos back outside and they each chose one that they liked. This might have been Daniel's favorite part of the whole project:


The boy loves sticks.

After we were back inside, I tied pieces of hemp onto their sticks. Daniel asked for 2 strings and Natalie asked for 4 strings, so that's what they got. Then I showed them how to thread our various objects onto the strings. I didn't give them directions after that. They were allowed to add as many or as little of each of the pieces in whatever order they wanted. 


Daniel loved the wooden beads. Natalie used all the objects and threaded them on her strings in what appeared to be random order. 

I am a little sad that they weren't all over the fabric pieces. I was especially fond of them. Natalie did use a couple, but I would've used the whole lot. This was an exercise in restraint for me. I kept wanting to shove a piece of fabric in their hands, and I kept having to tell myself to back off and let them create their own wind catcher. 

We did end up using two different kinds of string - the hemp was used for the pieces with larger holes. Plus, I liked the look of it - very natural. Then, they each wanted some fishing line to thread smaller things, like our jingle bells and sea shells. 

Once they were finished, I tied a hanging loop on each of their wind catchers, and we hung them on the front porch:

Summer Wind Catcher
Daniel, age 3

Summer Wind Catcher
Natalie, age 4

Briefly. After that, they decided that they wanted to give them to some friends. So down they came. And boy, were they excited when they gave them away! It made me happy :)


*          *          *

If you enjoyed this post, please consider subscribing by email or liking my page on Facebook to receive updates on new posts!


For a list of all the parties that I link up to each week, please visit my Linking Up page!