Monday, July 15, 2013

Two Flowers - A Magazine Project

Sometimes you just need to make something for yourself, you know? I love planning projects for the kids, and I am more than happy to help others with projects. But sometimes I find it so relaxing to make something without a deadline or a real purpose. Just because it's fun for me.

After a particularly hard day last week (I had several of those last week) I blew a sigh of frustration after the kids went to bed and grabbed a stack of magazines. I had a vision in mind, inspired by this pin.

Materials:
cardstock
scrap paper
magazines
scissors
pencil
thin paintbrush
Mod Podge
thin line Sharpie

Process:

I started by drawing and cutting out a couple of flower silhouettes, which I then used to trace onto cardstock.


Then I cut dozens and dozens of strips out of magazine pages. At first I was just going to use any of the pages, but since I had cut out flowers and I was working with Better Homes and Gardens, I headed for their garden section and found some amazingly beautiful spreads. So I stuck with my flower theme and used those pages only.


My plan was to fill in the silhouettes with the magazine strips, much like my inspiration picture. But after drawing them on cardstock I kind of loved how the flowers overlapped, and I thought it would be a mistake to cover that up. Then I thought it would be cool to fill the negative space with the magazine strips and leave the flowers white, so that's what I did.

I started at the edge.


I used Mod Podge and a thin paint brush to brush a little on my paper. Then I smoothed one strip on at a time. When I got to the edge of a flower, I painstakingly drew in the outline on the magazine strip, cut it out carefully with scissors and refit it onto the paper, making sure it fit like a glove before I adhered it.  I'm not exaggerating when I use the word painstaking. It was tedious. My back hurt by the end. But so worth it. 

The last step was to outline the silhouettes where they overlapped with a thin-line Sharpie.


I was planning on brushing Mod Podge over the entire piece at the end, but I changed my mind - for two reasons. The first is that I knew it would create terrible bubbles in the paper. When I was gluing down the strips, I did get creases every now and then, and I've worked with Mod Podge enough to know that that's a big no-no. Secondly, since I wanted to frame the finished piece I decided that it didn't matter whether or not it was sealed. 

So I just slapped that baby in a frame and called it a day. Or night. This was an after-the-kids-were-in-bed kind of project. And it took a few nights to complete. 

Two Flowers

Yay! I always love the satisfaction that comes from a finished project, especially when it comes out looking pretty much as I envisioned. That's always a plus.

As always, I'd love to know if you were inspired to make one of these yourself, and please send me a link if you blog about it! 

Thanks for reading!

*          *          *

If you enjoyed this post, please consider subscribing by email to receive updates on new posts!

You can also follow my blog through Instagram, Pinterest, Facebook, Bloglovin, or Google+.

Thanks for reading!

I've linked up with


For a list of all the parties that I link up to each week, please visit my Linking Up page!


Friday, July 12, 2013

Friday's Art Smarts: Tropical Bird Sculptures

Prepare yourselves for a picture heavy post. I must've gone slightly crazy with the camera during this project - I guess I felt the need to document every little mundane detail. But! I enjoy pictures, so...

This week I talked to the kids a little bit about 3D art - sculptures. We talked about how a sculpture is different from a 2D picture, that you can look at the piece from many different angles. And we discussed different materials that one could use to make a sculpture: wood, clay, stone...even ice! They really liked that idea and immediately wanted to break out a chainsaw to give it a try. Ahem. No.

And then we decided to make our own! Well, really, who are we kidding? This was the plan from the beginning. But the kids didn't know that ;)

Tropical Bird Sculptures

Materials:


Colored paper
Black marker (we used a Sharpie)
pencil
scissors
hole punch
yarn
feathers (we got ours at Michaels for $1.99 a bag)
glue
art mat (optional, but I highly recommend one, especially when using the permanent marker)

Process:

Step one is to prepare the bird body pieces. Depending on the age of the child, they can do this themselves. For my preschoolers, however, I took care of this step for them.

Fold your colored paper in half.


Cut a half circle shape out of the folded edge (do not use the entire edge, though).


Draw a smaller, full circle on the other side. This smaller circle will be the head, so I used the bird body to judge how large the circle should be.


Cut it out of both sides of the folded paper. You should end up with two smaller circles.


Next, draw wing shapes on the open edge.


Cut them out - you should end up with two wings. Notice the white oval in the picture below - this is the spot where you should cut out the bird's tail. 


Now you're ready!


For this project, I wanted to let my kids experiment with drawing lines. My goal was twofold: I wanted to give the kids an opportunity to use lines to create interesting designs through pattern and repetition. But I also wanted them to practice drawing with a purpose (as opposed to just scribbling), especially Daniel. Plus, this is awesome fine motor practice. 

So, before we even began drawing on the bird pieces, I brought out a practice sheet and showed the kids how to make patterns and designs using lines.


I encouraged them to use short straight lines over and over again, zig-zags, and spirals (even though spirals aren't technically lines, I thought they fit well with this idea. Besides, the kids loved 'em). 


After we filled the practice page with line designs, we turned to our bird pieces. I let them decorate the bodies and heads with lines.

Natalie chose short, straight lines for one side of the head and spirals for the other side. She also drew two small circle-shaped eyes.


Deciding whether or not she wanted to add more to the body...


Daniel did well with this project! I was proud of him because I wasn't sure how well he'd be able to control the marker to make these lines. He was so focused, and it paid off!

He made zig-zags on the bird's body. If you're working with an older child, I would encourage him/her to go into greater detail than Daniel did here. The more repetition you create with these lines, the neater the finished bird will look. 


After you've finished drawing the lines, it's time to assemble the pieces. Fold the body in half along the crease and glue one side of the head to a top corner. Then glue the other side of the head onto the opposite side.

Then glue on the wings - one on each side of the body (note: don't glue the body closed on the inside - that stays open to give the bird some dimension at the end).


Finally, glue the tail onto the back end. The crease in the tail should fit neatly over the crease in the body.

Feathers!

Add glue dots across the wings and tail:


And go for it!


One last step: cut a couple small triangles out of any color you'd like and add those onto the head to create a beak.

Ta Da!


We hung ours up to create a little mobile, although they won't be staying in this room. The kids both want to hang them in their rooms. Which I think is awesome. 

Tropical Bird Sculptures
Natalie, age 4
Daniel, age 3

I hope you guys all have an awesome weekend and thanks for reading!


*          *          *

If you enjoyed this post, please consider subscribing by email to receive updates on new posts!

You can also follow my blog through Instagram, Facebook, Bloglovin, or Google+.

Thanks for reading!


For a list of all the parties that I link up to each week, please visit my Linking Up page!


Wednesday, July 10, 2013

The Stomp Rocket!

On Tuesday during nap time we received a package in the mail. I wasn't aware that anything was coming to us, so it was very mysterious (turns out my husband knew about it, though). As soon as the kids woke up, they were all over it. I mean, who doesn't love a good surprise present every now and then?

The package had come from their grandma and there were some pretty cool things inside. 

Have you ever heard of this thing?


Oh my goodness, you guys. It's amazing. Seriously, a huge hit. 

It's so simple. In three steps, you have the launcher set up and ready to go. 

 I had no idea Daniel was making this face when I took this picture. I guess he was pretty excited ;)

Then get one of your foam rockets into position...


And blast off!


At first the kids were tentative, but they soon discovered that the harder they stomped, the higher the rocket would fly. 


And height was the goal.


Eventually they stopped stomping altogether and began jumping. Then there was an unspoken competition about who could jump from the furthest away. 

In short, they loved it. So much so that today Daniel announced that he wanted to be an astronaut when he grows up. 

After listening to them ask all morning if they could play with it again, I agreed to let them take it to the park with us. And at least 4 other kids came up and asked if they could have a turn. ...then we all had a lesson in sharing ;)

This toy is so totally worth every penny. It's super fun, and with all kinds of possibilities for science lessons we'll definitely be keeping it around for awhile.  

Two cautions: Make sure no one's face is in the line of fire. We had a few close calls, especially when the kids realized that they could shoot the rocket in any direction by repositioning the launcher. The rockets are so lightweight that if they fall down on you from above it's no big deal...but you don't want to get shot with one in the face. That could be bad. 

Also, it would be better to play with this toy in an open field or playground. Our rockets kept getting caught in the trees above, and at one point one landed on our roof. We were able to retrieve all of them, but we had a much easier time at the playground today. 


*          *          *

If you enjoyed this post, please consider subscribing by email to receive updates on new posts!

You can also follow my blog through Instagram, Facebook, Bloglovin, or Google+.

Thanks for reading!


For a list of all the parties that I link up to each week, please visit my Linking Up page!


Monday, July 8, 2013

Friday's Art Smarts: Hexagons

Well, Friday was a lot of fun. 

Dave had the day off. We woke up late, we played in the pool. My mom and sister came over before nap time (the key word here is before), and Dave and I took off on our bikes. We rode north on the beach. There were so many beach-goers that at one point we had to ride single file and zig-zag between everyone. Then we came south again on first street, a street that cars are allowed to drive on but really belongs to those on bikes and pedestrians. We visited with some good friends who were in the middle of laying new floors in their kitchen. Then we came home and got ready for dinner out and a movie. 

Really, my mom and my sister were so awesome to give us a whole afternoon and evening off, something we haven't been getting a lot of recently. 

And if they hadn't come over before nap time, then we wouldn't have been able to ride our bikes, and I've been craving bike riding time lately. You don't realize how much you miss stuff like that until you get it again, you know? But nap time is when I usually publish a new post.

Now you know why I'm posting Friday's Art Smarts on Monday. Boo for being late. Yay for better late than never! (And also time off.)

Alright, on to the meat and potatoes.

Hexagons. What a fun little shape. I didn't really appreciate hexagons as a child, but as an adult, I've come to love these little guys. Have you seen these quilts?


I've been seeing them a lot lately, and I am in love with the design. It's so eye-catching. Almost makes me want to try to make one myself. But alas, I'm not really a quilter.

I am, however, not willing to shelf that design just yet. What if we used the same concept to create some math art? That would be a lot of fun, wouldn't it? Yes! It would!

Materials:


Many hexagons cut out of pretty papers (download free stencil here)
art paper
glue

Prep:

Ahead of time, use the stencil to trace and cut out your hexagons. If you have a very particular artist, like I do, you may want to involve him or her in choosing the paper that gets used.


We used all kinds of paper for this project, including scrapbook paper, old Christmas cards, paper bags with cool designs, and paper that I had block printed years ago. I never throw anything away. Sometimes it's a curse...and sometimes it's a blessing ;)

Process:

We started by reviewing basic shapes, including squares, rectangles, circles, and triangles. Both of my kids are pretty solid on their shapes, so this didn't take long. Then I asked each one to grab one of the hexagons out of the basket and take a look at it.

We counted the sides. We counted to corners. We noticed that there were the same number of corners as sides. We also noted that all the sides were the same length. Then I took a few hexagons and showed them how they "fit" together to make larger designs and let them play with that idea themselves. 

After they had played for a few minutes, I introduced the glue and told them that they could create their own design using any of the hexagons in the basket that they liked. 

They immediately got to work.


The only rule here is that each new hexagon has to touch another hexagon in some way; you can't glue one off to the side by itself. 


Other than that, it's up to the kids how the project goes.

At first, I did try to get them to leave some space between the hexagons to create a similar effect as the quilt above. But I quickly realized that they would have an easier time - and the finished piece would look neater - if they just let the shapes touch. So we went with that idea instead. 

Aaand... 

Daniel, age 3

Natalie, age 4

This project was a huge success! They loved making a pattern with the hexagons. Plus it was super easy and simple to set up and didn't require an extra trip to the store (bonus!). I've been thinking that I might extend this idea to include all the pattern block shapes: triangles, trapezoids, squares, rhombuses, etc. I think they would have just as much fun with that!

As always, let me know if you try this project with your kiddos, and if you blog about it, I'd love to see what you've done!!

*          *          *

If you enjoyed this post, please consider subscribing by email or liking my page on Facebook to receive updates on new posts!


For a list of all the parties that I link up to each week, please visit my Linking Up page!

<a href="http://www.bloglovin.com/blog/8307997/?claim=n2xp9h97xns">Follow my blog with Bloglovin</a>


Thursday, July 4, 2013

Decoupaging Boxes

Decoupage is the art of adhering pieces of paper to another object with a decoupage medium, like Mod Podge. It is, in my opinion, one of the simplest ways to transform an ordinary object into something truly unique - and it is so simple. A 3 year old could do it.

In fact, a a 3 year old has done it.

I've been letting my kids explore this technique lately (you can read about our first project using Mod Podge here) because it is simple and also because they love it. Nothing like a win-win! (grins)

On Monday I announced that we were taking a trip to Hobby Lobby. My original plan was to get some sort of sewing kit that would introduce very young children to sewing, but while I was looking at the options, I decided that it would be a mistake. Natalie is just too young still for that kind of project. We have lacing cards at the house...I decided that the best thing for her right now, as far as sewing, would be to practice with those cards.

But we were already in the store, and the kids were pumped. I mean, they were shouting and exclaiming and waving their arms wildly about. It really made me want to bring them to Hobby Lobby more often. I ended up walking out of the store $5 poorer, but with two very excited little kiddos. It really doesn't take much to make them happy.

The thing they were so excited about were these cardboard boxes. They both reeeaaally wanted to get a box. So that's what we ended up taking home with us. I also walked us over to the paper aisle and let them each choose a piece of decorative paper. Daniel had his in five seconds or less, but Natalie spent a good 5-10 minutes deliberating. Big decision.

Okay, okay. Here's what we did with those boxes.

Materials:


 1. plain box
2. tempera paint
3. paint brushes
4. decorative paper
5. Mod Podge (or other decoupage medium)
6. brush for painting on the Mod Podge
7. scissors (optional)

Process:

I began by letting my kiddos paint their boxes. I knew they probably wouldn't cover the entire box with paper, so I wanted whatever didn't get covered to still have some color.


This was the messiest part of the whole project (and it wasn't so bad).


Let the paint dry. We let ours dry overnight and finished the boxes the next day.

When we sat down again, I brought out the paper and scissors and told the kids to cut shapes out of their paper.

My first idea was to cut the paper to size and fill the whole box with it, but I realized even before we began that that would be too hard and I'd end up doing more of the project than I was comfortable with. So instead, I gave them permission to just kind of go crazy with the scissors.

Natalie happily obliged and Daniel tried. But he's still getting the hang of cutting and it's difficult for him. So after a few minutes, he put the scissors down and started tearing the paper into small pieces.

The boy's like Linus with his Blankie. He actually wears it tied around his shoulders like a cape. Turns out that stereotypes are stereotypes for a reason.

And you know what? I really liked that effect! So I encouraged him to keep going.

Next, brush on the Mod Podge. You need a good, healthy first layer.


After the first layer, add some paper. The main thing to remember here is that you really need to press the paper down hard to get all the air pockets out. If you neglect this step, you might end up with bubbles in the end. Not terribly nice.

If you want to add layers and layers of paper (as Natalie did, above), make sure you put a layer of Mod Podge between each piece.

After the paper, add a final top coat of Mod Podge, and... that's it! It dries to the touch pretty quickly, but I made my kids wait another night before they could play with their boxes.

So super simple, even a 3 year could do it ;)


Treasure Box with Web
Daniel, age 3


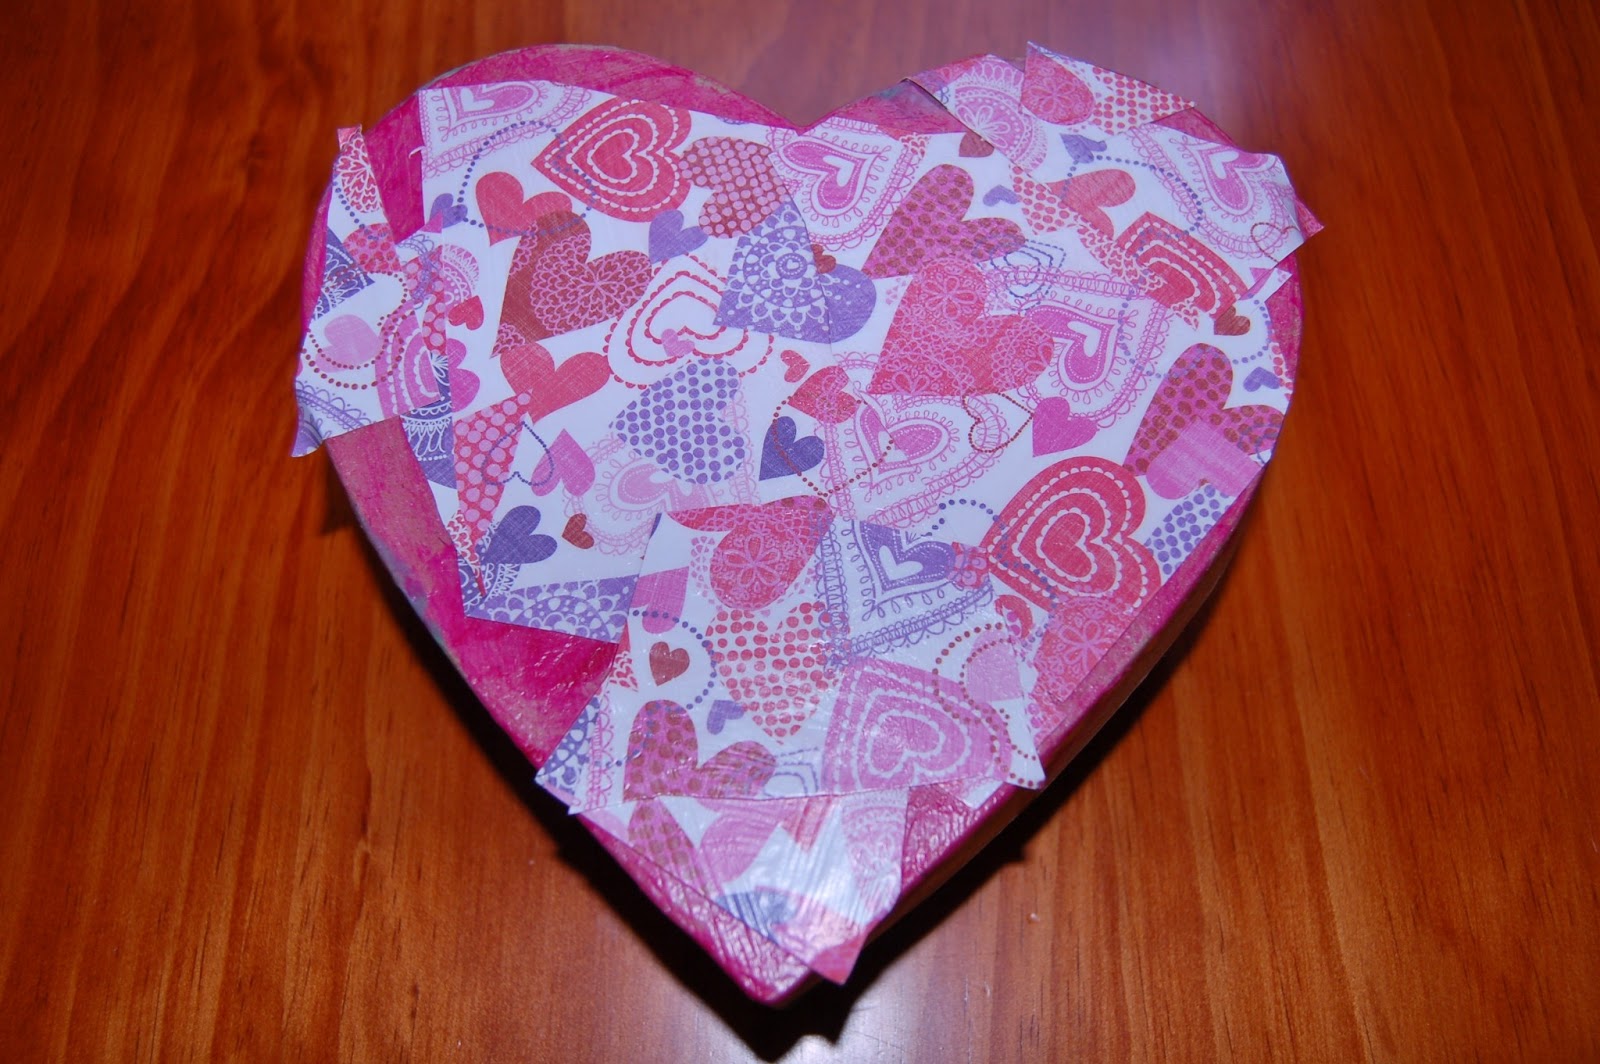
Heart-Shaped Box
Natalie, age 4

Lots of fun and not a lot of money or preparation! And so many possibilities. If you're not careful, you're going to begin looking around your house with crazy eyes, wondering what you can decoupage next. Trust me, I've been there ;)

*          *          *

If you enjoyed this post, please consider subscribing by email or liking my page on Facebook to receive updates on new posts!


For a list of all the parties that I link up to each week, please visit my Linking Up page!


Monday, July 1, 2013

The Floor Pillow That Nearly Killed Me

This is the floor pillow that nearly killed me.


"Could you make a floor pillow?" she asked. "It's for our new family room at the church."

"Sure," I said.

Easy, I thought. I'm an expert, my mind added.

Well. Not quite an expert. I've made exactly one.


Before this one. Now I've made two. But this one nearly killed me.

"It didn't nearly kill you," my husband suggested. "It just taught you some things."

Oh yeah.

He's right.

So I give you, in no particular order, the things the-floor-pillow-that-nearly-killed-me taught me:

1. Figure out your steps before you start a new project. I will probably never learn this one properly. It's just not my style to sit down and plan everything out beforehand.

But it's true. A little planning here would have saved me a lot of heartache.

Exhibit A.


This is the point at which I should have sewn on my industrial zipper. But since I didn't plan my steps beforehand, I didn't know that. And by the time I was thinking zipper, most of the rest of the pieces were already sewn together...making it very difficult to sew on a zipper for a complete zipper novice. Which is what I am.

Live and learn, man.

2. Don't curse in front of your kids. It's good to have a project every once in a while to remind you that this is never a good idea. Ever.

3. Procrastination is the enemy.

"I'm an expert."

"I can knock this thing out in two days, tops."

"I've still got a week."

"I've still got a few days."

"Oh, gosh, it needs to be ready tomorrow?"

You'd think, being in my 30's and having graduated from high school and college, that I would've learned this by now. But I have not.

4. Your fabric doesn't hate you. I'm still not sure about this one. Or how it happened that none of my pieces were square by the end. I'm pretty sure I cut them square. But they didn't end up that way. What in the world, man?

5. You can always hide the bad part.


Hallelujah!

6. Patience. Whatever you do, don't throw your machine across the room.

Take breaks when you need them. This tip works really well with number 3. If you haven't waited til the end, then you have the freedom to get away from it for a little while before coming back. I did leave myself enough wiggle room to take breaks. And I always felt refreshed and ready to tackle the challenge when I sat down again.

7. Use Fiberfill from old pillows. 

This one only works if you're not squeamish. But seriously, fiberfill isn't cheap.

I decided to stuff my first pillow with 2 small bags of fiberfill at 10 bucks a pop. Then I had a whole lot of empty pillow and not a whole lot of money, so I got creative. I cut up half a bag of old baby clothes destined for Goodwill and threw them in there. I thought it was such a great idea until I sat on it. My advice? Don't go that route. It's lumpy.

So...It would have taken 7 to 10 bags at least to fill this giant pillow. That's a lot of money for an "affordable" homemade floor pillow. So I bought some throw pillows from Goodwill. I smelled them. I inspected them for anything undesirable. Then I ripped those babies open and gloried in all the awesomely-almost-free fiberfill.

You know those scenes in movies where the main character finds a treasure chest filled with gold coins and precious stones? And they always end up throwing the gold everywhere? Now I know why they do that.

Floor pillow insert, newly stuffed with old fiberfill. Not lumpy.


8. Have the right equipment before you begin. Sigh. If you do not have the right equipment, you will begin to hate something when things go terribly wrong.

Remember this picture from above?


All those awful ugly stitches are the result of not having a proper zipper foot for my sewing machine. I used what I thought was the zipper foot...but upon closer inspection, it was wider. It had two sides. Almost like someone thought, "Hey, let's make this easier. Let's make it so that this foot allows you to sew on either side of the zipper." Which is great, except that that makes the foot twice as wide. And completely ineffective (if it was actually a zipper foot at all).

I realized this all too late. But by that point I was a quarter of the way done, so I barreled ahead, hoping for the best. The best did not happen. And I ended up hand sewing a bunch of stitches just to clean up my mess.

Grr. All because of a little extra metal.

9. Keep going. Sometimes it's good to do projects for other people. If this was a personal project, I might have quit at least 3 different times. And then I would never have learned how to actually install a zipper.

Something my husband reminded me of when I was nearly in tears last Saturday. I did not appreciate it at the time.

...but he was right.

10. There is light at the end of the tunnel.


This is the most important one: eventually you will be done.

And we almost always are our own worst critic.

The pillow isn't perfect, but this is:


It's good to stretch yourself. It reminds you that you haven't got it all figured out yet. It teaches you to lean on someone else when you know you can't do it by yourself. 

And it's good to serve, to give, especially when it's really a sacrifice. David said one time that he wouldn't offer a sacrifice that didn't cost him anything (2 Samuel 24:24). The ones that cost us something are the ones that mean the most.

And that's what the-floor-pillow-that-nearly-killed-me taught me.

*          *          *

If you enjoyed this post, please consider subscribing by email or liking my page on Facebook to receive updates on new posts!


For a list of all the parties that I link up to each week, please visit my Linking Up page!